How to Edit Text in Image With Same Font, Step by Step
Replace text in a photo without the font looking wrong. Compare an AI text replacement tool, Canva retype, and Photoshop, plus tips that keep it natural.
 TextEditImage Team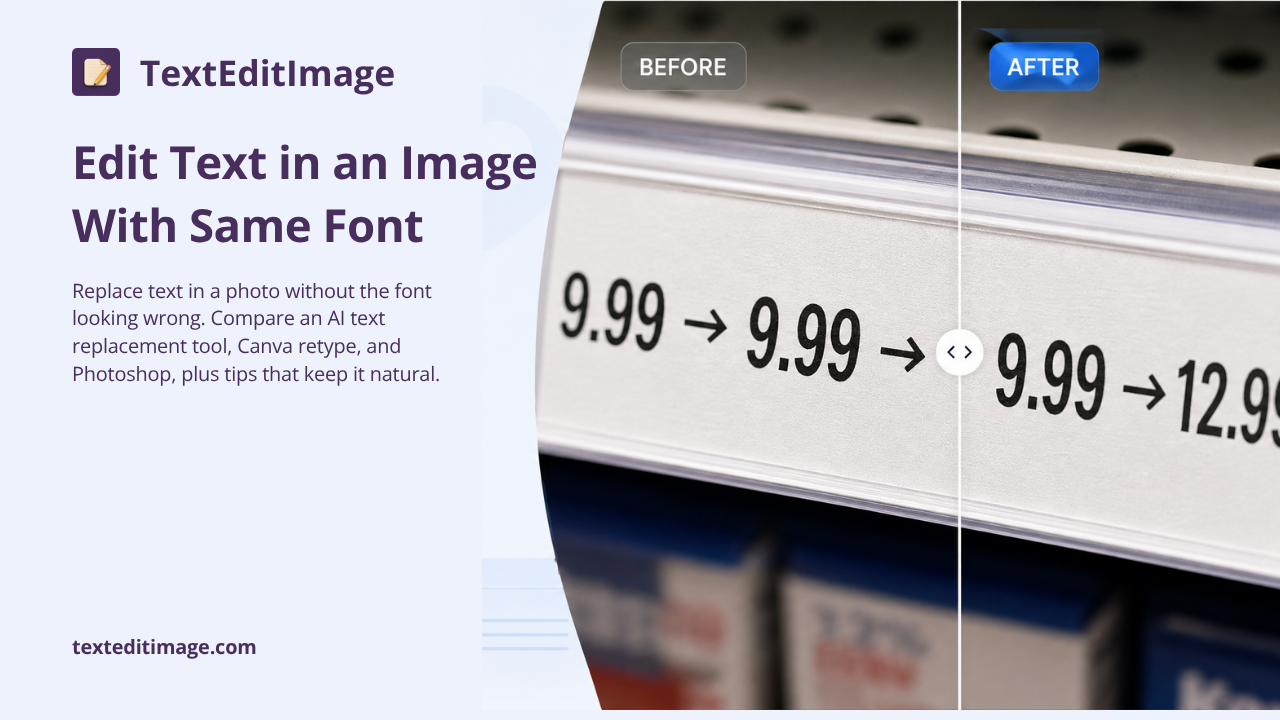
How to Edit Text in Image With Same Font
You replaced the words in your image, but the new text is a different font, a different weight, a different color. Now the edit is obvious: anyone can see it was photoshopped. The font is the first thing the eye catches, so if you want a result that looks like the original, matching the font is the whole job. This guide shows three ways to edit text in an image without changing font, from a five-minute AI method to manual retyping.
Why Matching the Font Matters
A poster, a product shot, a screenshot with a typo: the text in it already has a style. Weights, spacing, lowercase quirks, the way letters sit on the baseline. Change any of that and the words no longer belong to the image, even if the layout stayed identical.
Think about a brand label. The logo is letterspaced in a specific way. Retype it in a system font and the label reads "fake" from across the room. Same for a screenshot of a form: the UI font is nearly always something specific, and a swap is visible in one glance.
Here is the quickest example: change a price on a store shelf tag. Keep the tag layout, keep the photo, replace "$12.99" with "$9.99" in the same bold condensed font, and nobody can tell. Do the same with Arial, and the eye jumps straight to it.


That before/after shows the difference. Your goal is the left side of that picture: a swap that looks like the label was always printed that way.
Method 1: Use an AI Text Replacement Tool
The fastest way to edit text in an image with the same font is an AI text replacement tool. TextEditImage reads the existing lettering, keeps the font and color, and draws the new words in that style. This is the method to use when the original font is scanned, stylized, or not available anywhere.
- Upload your image to the tool. Start with the highest resolution version you have, not a compressed social-media copy.

- Select the text you want to replace. Most tools let you draw a box around the words or just describe which text to change.
- Type the replacement text exactly as it should read, including any symbol, hyphen, or currency sign you need.
- Check the result at 100% zoom. Look at the letters that stayed: is the weight of the new text close to the old one?
- Export the full-resolution image. Keep the original file untouched in case you need to redo the edit.
The AI keeps the original font by analyzing the surrounding letterforms, so you do not need to know what font it is or hunt for a download. If the result is close but not perfect, most tools accept a follow-up instruction, like "make the stroke a little thinner" or "move the text down two pixels".
This is also the approach that handles skewed text: text on a curved label or a tilted can does not need straightening first, because the tool sees the letters in context.

Method 2: Manual Retype in Canva
You can do it by hand in Canva, but plan to spend real time. This works when the font is a common one and you are willing to nudge things into place. It is slower and less forgiving than the AI route.
- Upload the image, add a text box on top of the old text, and pick a font that is as close as you can find. Match weight and spacing, not just the name.
- Hide the old text by covering it with a shape in the background color, or crop it out if the layout allows. Then position your new text box exactly where the old letters were.
- Adjust letter spacing, size, and color until the new text lines up with the image, then export. Expect several rounds of zooming in and out.
The weakness is obvious: a font that is close is not the same font. Curved text, perspective, and shadows also do not follow the text box. If the original font is custom or even slightly unusual, Canva stops being a real option.
Method 3: Photoshop (Advanced)
Photoshop gives you full control, at the cost of technique. Use it when you need pixel-perfect work on a document, a mockup, or a serious retouch.
- Identify the font, then match it: right-click the text layer and use Match Font, or recognize it with WhatTheFont.
- Cover the old text with a content-aware fill or a selection of clean background around it.
- Retype the replacement on its own layer, size and track it to align, and blend color and shadows to the surrounding pixels.
It produces the best result in skilled hands, and it is the only method where you can fix every imperfection manually. But it takes practice, and for a one-off edit the setup time usually is not worth it.
Comparison Table
| Method | Difficulty | Time | Font fidelity | Free option |
|---|---|---|---|---|
| AI text replacement tool | Easy | Minutes | High, keeps the original style | Yes, on most tools |
| Canva manual retype | Medium | 20+ minutes | Medium, close font only | Yes |
| Photoshop | Hard | 30+ minutes or more | High, if you match the font well | No ongoing free tier |
For most real cases the AI tool wins on time and fidelity at once. The manual methods only pull ahead when you need absolute control over every pixel. If you want to see the AI route in action without installing anything, the free online text editor accepts an upload and shows the result in the same window.
Pro Tips
- Always edit the original resolution. A screenshot scaled down for social loses the fine letter details the AI needs to copy the font.
- Avoid heavily skewed perspective. Straight-front text matches almost perfectly; text at a steep angle is the only case where a flat replacement still looks off.
- Keep the background clean. Busy textures behind the letters make the new text stand out even when the font matches, so a simple backdrop helps the illusion hold.
FAQ
Can I keep the exact same font? Yes. An AI replacement tool copies the style of the surrounding letters instead of guessing a font name, so the result keeps the original font even when it is a custom or scanned design.
Is there a free way to edit text in an image? Yes. Our tool on the homepage is free for a quick edit: upload, type the replacement, and it keeps the font and background. Canva's free tier also handles a manual retype if you accept a font that is merely close.
Does this work on screenshots? It works well on screenshots, especially UI and form screenshots where the text is straight and high contrast. The same steps apply: upload the screenshot, select the words, type the replacement, and export.
Try It on Your Image
If your only goal is to fix the text fast, try our free AI image text editor on the homepage. Upload, type the replacement, it keeps font and background, and you export in a couple of minutes. That is the whole workflow this guide walks through, minus the manual part. No account is required to start, so you can test your screenshot or label photo right now.